Trial Service
The Trial Service allows users to test AgnosPCB’s Automated Optical Inspection (AOI) service for free, using their own camera to check the integrity of their assembled Printed Circuit Boards (PCBs)
Can i use any camera?
Yes, you can, but the AgnosPCB neural network AOI software will need the best possible photo of the PCB in order to provide optimal results.
If you want to test the service, feel free to use a smartphone camera, but keep in mind that you will not get the most of the Agnospcb AOI software.
Is AgnosPCB fast? reliable?
It is as precise and reliable as an expensive conventional AOI system. But, why not check it out by yourself?
Using your smartphone with your trial account
IMPORTANT: Quality of the inspection results
A minimum of 12Mp photography is mandatory. The quality of the photography is highly depended on the camera sensor / optics.
Low resolution, blurred or non-detailed images of the circuits/panels you want to inspect, will lead to poor fault detection results. Try to take the best possible photos following the tips listed below.
NOTE: Small faults as short-circuits or defects related with 0402 size elements may not be detected if the photos lack of enough resolution.
For the best possible detection results, we have designed an inspection platform based on the powerful APS-C 24 Megapixels sensor. Contact us for more info.
This Webapp is fully functional, but does not offer all the features currently available. We strongly encourage clients to use the inspection tool software instead (for Windows OS). Using it, you will make the most of the Agnospcb service. If you want to download it, get to this page and use the download password provided with the TRIAL ACCOUNT email.
You can use your USER ID and PASSWORD in both the Agnospcb Webapp or Inspection software tool.
Using a smartphone to check the PCBAs integrity
1) Get your smartphone
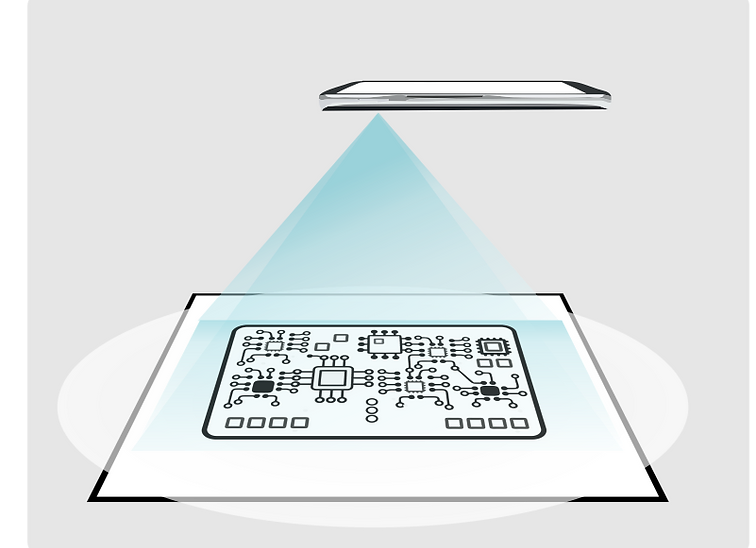
You will need good camera smartphone. The better the camera, the better the visual inspection detection. Almost any mid-range, not too old, smartphone will work. Place your board on a light color surface. The photo has to be taken from a distance of approximately 20-22 cms (8-9 inches).
We strongly recommend using a tripod so the smartphone will stay steady during the process.

2) The reference board
First, you will need to set a reference board. An example of what the neural network will use to compare all the PCBAs with. A “golden sample” This reference board will be a pre-checked and working condition PCB.
TIPS:
- Do not use digital zoom
- Center the board/panel in the photo
- Avoid to all cost light reflections on the board. Uniform lighting conditions will bring the best inspection results. Keep in mind that the neural network will not see what a technician can not see on the photo.

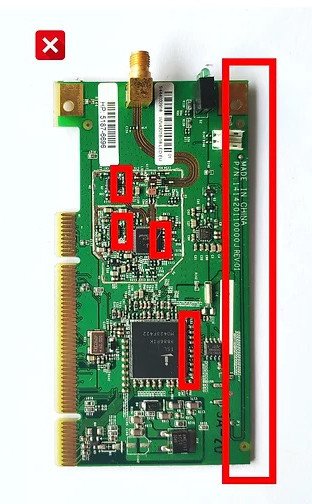
Avoid casting shadows
That will reduce the visual inspection capability to detect faults
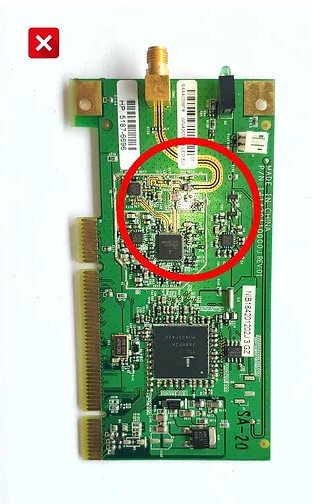
Keep away direct light sources from the PCB.
They will create reflections on its surface
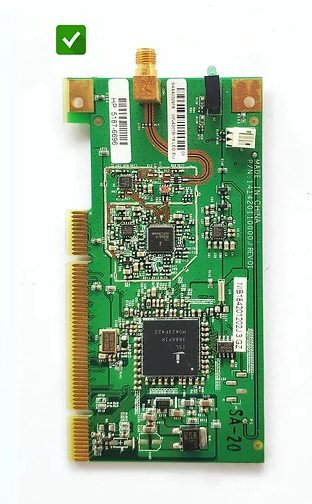
A good ambient light
and a detailed photo will drastically improve the detection capabilities
3) Take photos of the boards to inspect
Now, once the reference board has been set. Take photos of the boards to inspect.
A perfect alignment or placing the board always in the same position is not mandatory. The neural network will take care of correcting perspective and orientation but try not to place the boards too far from reference board original location.
TIPS:
- Do no cast shadows with your hand or any other object.
- Blurry photos will provide poor results.
Using the WebAPP to inspect the boards
The WebApp allows you, in a fast way, to inspect the board using a simple user interface. Just drag and drop the photos taken to your PCBAs to check their integrity. For a better results analysis, we recommend using the Agnospcb inspection tool software.
You will need a USER ID in order to get access to the inspection tool. Contact us if you are interested. Once you get one, you are set to go.
WebApp user inteface
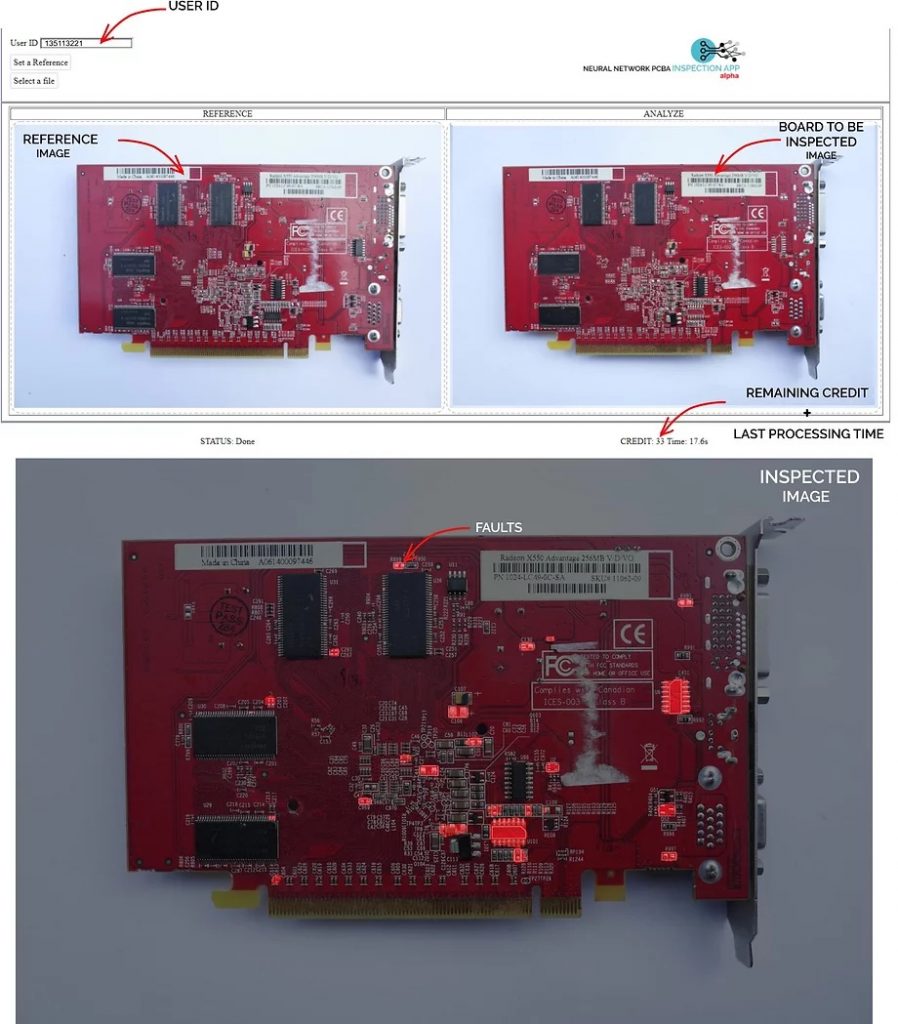
NOTE: Either you are running the WebAPP in a tablet/smartphone or Computer, the processing time and results will be the same.
Drag and drop the photos taken directly to the WebAPP (as shown in the video above). To do that, connect the smartphone to your computer using a USB cable, set the smartphone in “storage mode” and ready to take photos. Open its DCIM/Camera folder to access to the latest photo taken. Then, just drag and drop them into the WebApp.
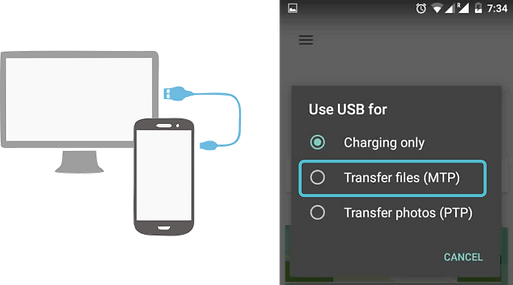
If you are using an Android device, once connected to the computer you will be prompted for an option.
> Select TRANSFER FILES
Then, from the computer, go to the CAMERA´s photos folder. There you will find the latest photos taken. Once there, just drag and drop the photos of the boards to the WebApp
4) Just wait few seconds to get results
NOTE: the “test server” may be under continuous use by several simultaneous users. This may cause abnormal delays in image analysis. Agnospcb clients access dedicated servers without queuing delays

